 Setup PixVerse
December 6, 2024
Table of contents
- Create PixVerse.ai account
- Configure PixVerse.ai API account
OPTIONALConfigure PixVerse API to use the current PixVerse.ai session
Approximately 2 minutes to complete setup steps.
This is the setup guide for PixVerse API. An active PixVerse.ai account and a useapi.net subscription are required for the API to work.
Create PixVerse.ai account
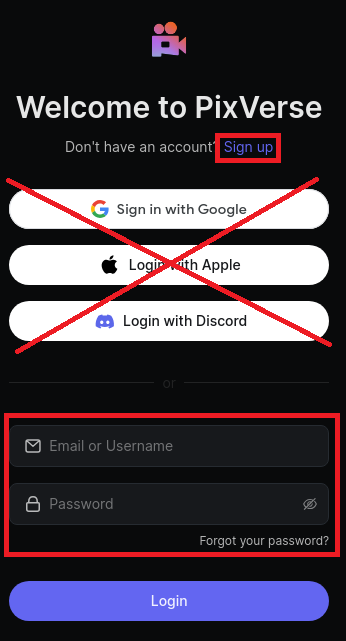
Navigate to PixVerse.ai and sign up with an email account. Our API does not support Gmail, Apple, or Discord accounts. We strongly recommend creating a separate PixVerse.ai account designated for API work.
Configure PixVerse.ai API account
Now that you have a working PixVerse.ai account, configure it for API access using POST /accounts/email. You will need your email and password. You should receive response 200 if successful.
OPTIONAL Configure PixVerse API to use the current PixVerse.ai session
The PixVerse.ai website enforces a single active session for a given account. When the API is running, it will terminate your web session. If you want to use the website and run the API simultaneously, you will need to perform the following steps in the exact order:
- POST /accounts/
emailusing youremailandpassword. - Navigate to PixVerse.ai, logout from your account, and login again.
- Using the screenshot below, locate the session
token.
Screenshot

- POST /accounts/
emailusing youremail,passwordand the obtainedtoken. - Keep the website open. Now, your API and your browser will share the session token, allowing you to use both.
Keep in mind that the API will eventually try to refresh the token, so the approach described above is only effective for a limited time. We strongly recommend not using the API account for any manual generation to avoid any interference with the API.